When you clean your lighting fixtures the right way, you help them last longer and look their best. Dust can cause overheating and make bulbs fail too soon. Try these Cleaning Tips with soft cloths and safe products. You’ll keep your lights shining bright and working well.
Clean fixtures help LEDs stay efficient.
Routine cleaning and inspection improve performance.
Key Takeaways
Cleaning lights often stops dust from piling up. Dust can make lights too hot and bulbs not last long.
Turn off the power before you clean. Wait for bulbs to cool down. This keeps you safe from burns and shocks.
Use a soft cloth and gentle soap to clean. This helps your lights stay safe and look nice.
Safety First
You should always think about safety before cleaning. Cleaning lighting fixtures can be dangerous if you skip steps. Here are some dangers you might face:
Hazard Type | Description |
|---|---|
Falls | You may need ladders or lifts for high ceilings. This can make falling more likely. |
There are risks from wires and problems with the circuit breaker. | |
Physical Strain | Carrying heavy things on ladders can hurt your body. |
Power Off
Turn off the power before you clean any fixture. Let bulbs and surfaces cool down first. This helps you avoid burns and electric shock. Never clean a fixture if it is hot or plugged in.
Tip: If you see wires showing or cords that look broken, stop right away. Call a professional to fix these problems.
Gather Tools
Get your tools ready before you start. You need a soft microfiber cloth, mild soap, water, and a towel. Do not use paper towels because they can scratch. Stay away from strong chemicals since they can harm your fixtures.
Not enough insulation can show wires and cause electric shock.
If the circuit breaker fails, electrical dangers can get worse.
Broken electrical items can stop working and be unsafe.
Using extension cords the wrong way can start fires.
Not taking care of fixtures can cause big electrical problems later.
Use Soft Cloths
Use a soft cloth to dust and wipe. Microfiber cloths are best because they hold dust and do not scratch. If you want to protect your fixtures, always use gentle materials. This keeps your lights looking nice and working well.
Glass Fixtures

Dust Removal
Dust loves to settle on glass fixtures. If you let it build up, your lights can look dull and even overheat. You should dust your glass fixtures at least every three months. If your lights are in busy rooms, you might want to clean them more often. Use a soft microfiber cloth to gently wipe away dust. Microfiber works better than terry cloth because it won’t scratch the glass. Always use a sturdy ladder if you need to reach high places.
Tip: Never forget to turn off the power and let bulbs cool before you start. This keeps you safe from shocks and burns.
Deep Clean
Sometimes, dusting isn’t enough. For a deeper clean, try these Cleaning Tips:
Remove the glass parts if you can. This makes cleaning easier.
Mix a little mild dish soap with warm distilled water.
Soak the glass in the solution, then gently scrub with a soft cloth.
Rinse with clean water and dry with a lint-free towel to avoid water spots.
If you can’t remove the glass, dampen your cloth and wipe carefully.
Reason | |
|---|---|
Turn Off the Power | Prevents electric shock during cleaning. |
Allow Bulbs to Cool | Avoids burns from hot bulbs. |
Use a Sturdy Ladder | Keeps you safe when reaching high spots. |
Gather Supplies | Makes cleaning faster and easier. |
Prevent Scratches
You want your glass fixtures to stay clear and shiny. Avoid using paper towels or rough fabrics. These can scratch the surface. Always dry the glass with a lint-free towel to stop water spots from forming. If you see any chips or cracks, handle the glass with care and think about replacing it.
Note: Not turning off the power or using the wrong cloth are common mistakes. Stay safe and gentle for the best results.
Metal Fixtures
Dusting
Metal fixtures can collect dust quickly, especially in busy rooms. You want to keep them shiny and free from grime. Start by grabbing a soft microfiber cloth or a paint brush. These tools help you reach tight spots without scratching the surface. If you need to clean high fixtures, use a sturdy step ladder and wear gloves for safety. A damp cloth works well for general cleaning. You can also use a mild soap and water solution for brass or painted bases. Always dry the metal with a towel to prevent water spots.
Tip: Dust your metal fixtures every month to stop buildup and keep them looking fresh.
Polish
Polishing metal fixtures brings back their shine. You can use lemon oil for polishing metal bases. For tarnished brass or copper, try rubbing lemon juice and salt on the spots. Baking soda mixed with lemon juice cleans copper without scratching. If you see rust, soak a cloth in lemon juice or white vinegar and gently scrub the area. Avoid using abrasive pads or harsh cleaners, since these can damage the protective coating. For heavier tarnish, make a paste with lemon juice, salt, and cornstarch, then rinse with mild soap and water.
Tool | Use |
|---|---|
Soft cloth | General cleaning and drying |
Lemon oil | Polishing metal bases |
Paint brush | Dusting hard-to-reach areas |
Sponge | Applying cleaning solutions |
Protect Finish
You want your metal fixtures to stay beautiful for years. Wipe them down after cleaning to keep them dry. This prevents hard water from causing corrosion. For outdoor fixtures, apply a metal primer and metal paint to restore and protect the finish. Olive oil helps preserve shine and stops future tarnishing. Avoid aggressive cleaning solutions like steel wool pads and chlorine tablets. These can scratch and ruin the finish. Regular Cleaning Tips and gentle care will keep your metal fixtures looking their best.
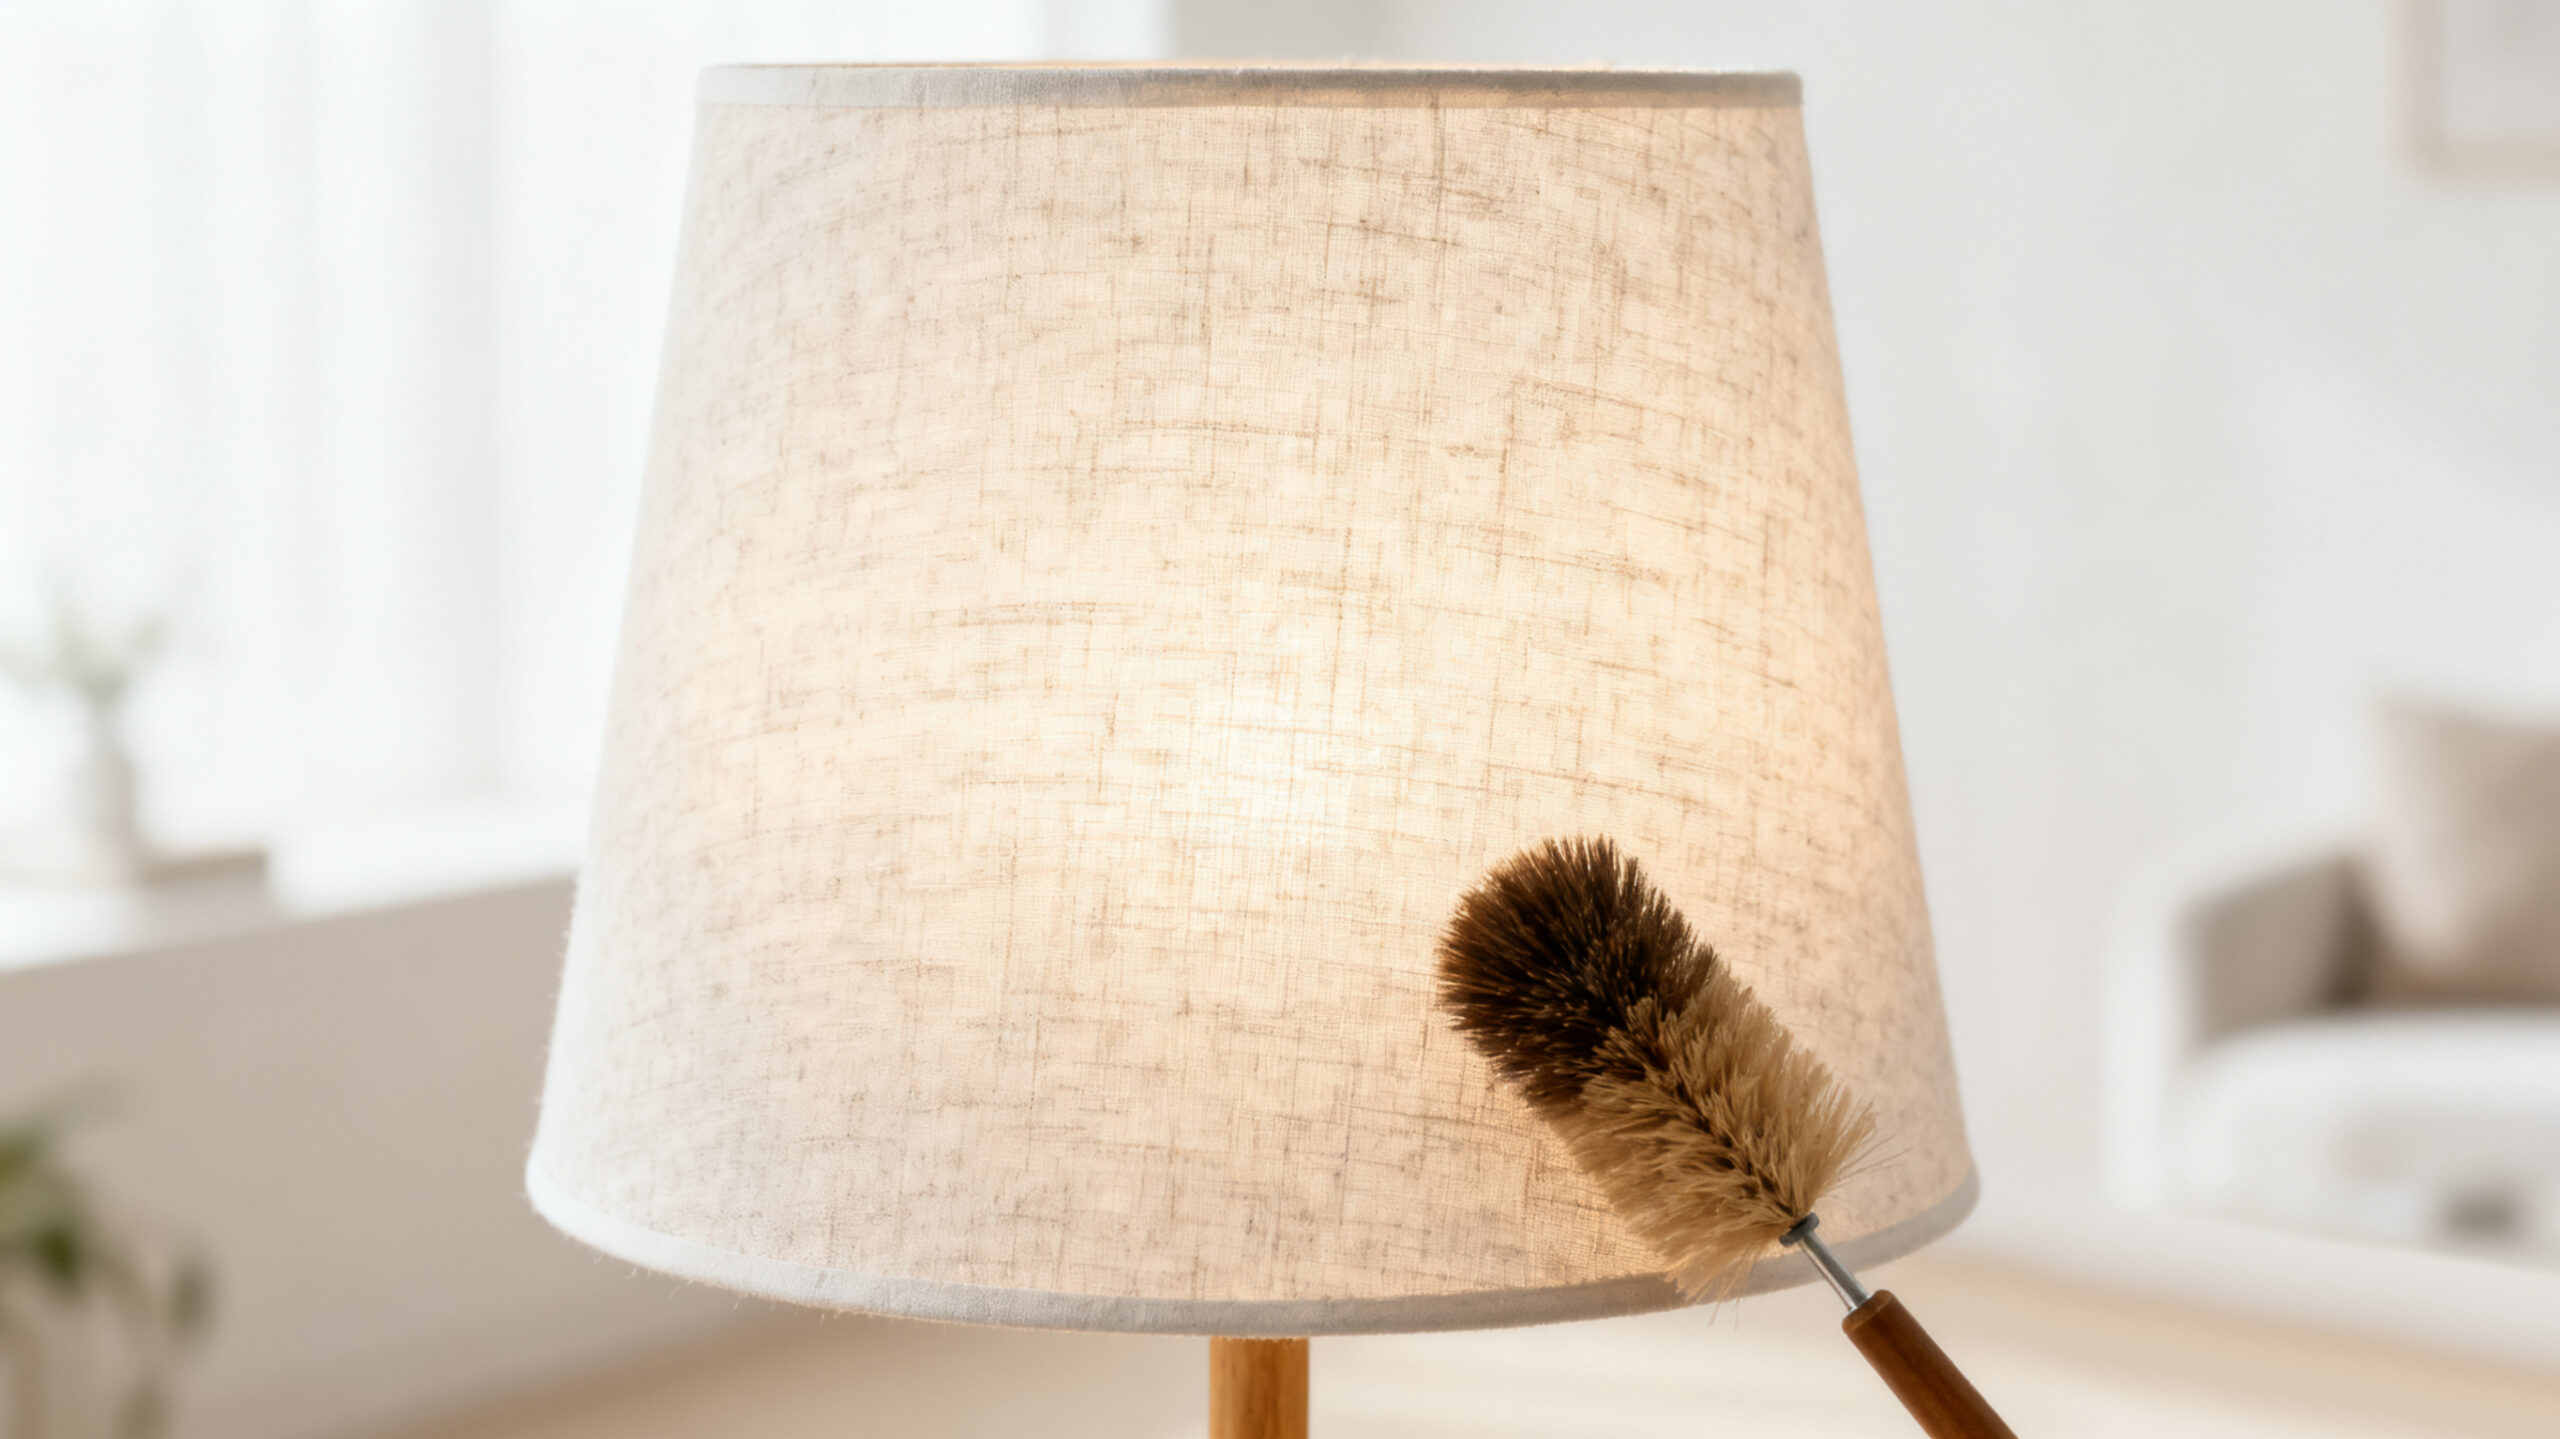
Fabric Shades
Gentle Dusting
You want your fabric shades to look fresh and clean. Dust can build up quickly, especially if your lamp sits near a window or in a busy room. Try these easy ways to remove dust:
Use a microfiber cloth to gently wipe the surface.
Grab a vacuum cleaner with a brush attachment for deeper cleaning.
A soft-bristled paintbrush works well for pleated shades.
Disposable dusters and lint rollers are great for quick clean-ups.
Tip: Always unplug your lamp before you start dusting. This keeps you safe and helps you reach every spot.
Spot Clean
Sometimes, you notice a stain or spill on your fabric shade. You can fix this with a few simple steps. First, check the care label. If it says water is safe, mix a little mild dishwashing liquid with cold water. Dip a microfiber cloth in the solution and gently blot the stain. Don’t rub hard, or you might damage the fabric. For stubborn spots, try a lint roller or use a vacuum with a brush attachment. If your shade is delicate, use a hair dryer on the cool setting to blow away dust.
Tool | Best Use |
|---|---|
Microfiber Cloth | Light dust and gentle stains |
Lint Roller | Quick dust removal |
Vacuum (Brush) | Deep cleaning |
Mild Soap Solution | Spot cleaning |
Preserve Color
Sunlight can fade fabric shades over time. UV rays break down the dyes and fibers, causing colors to look dull. You can protect your shades by keeping them out of direct sunlight. Interior shades or curtains block most UV rays and help your lamp shades stay bright. If you want your shades to last, rotate them every few months so one side doesn’t get all the light. Regular Cleaning Tips also help keep colors fresh and prevent wear.
Note: If you see fading or wear, think about moving your lamp or adding a UV-blocking liner.
LED Fixtures
Dry Cloth Use
LED fixtures need gentle care. You want to keep them bright and working well. Always start by turning off the light and waiting at least 30 minutes. This keeps you safe from electric shock. Grab a dry, soft cloth and gently wipe the LED bulb or panel. Avoid using paper towels because they can scratch the surface. If you see dust on the housing, use a microfiber cloth to remove it. You should never spray liquid directly on the bulb. This can damage sensitive parts inside.
Tip: Place a towel under your work area to catch any falling pieces or drips.
Damp Cloth for Lenses
Sometimes, you notice smudges or grime on the glass lens. You can use a soft damp cloth for this job. Mix a little mild soap with water if you need extra cleaning power. Wipe the lens gently, then dry it with a clean towel. Stay away from ammonia or bleach. These chemicals can crack plastic and cloud the lens, making your light dimmer. If you need to clean tough spots, use a gentle cleaner made for LED fixtures.
Step | Description |
|---|---|
1 | |
2 | Remove Cover: Take off the cover if possible. |
3 | Clean Housing: Wipe with damp cloth and soapy water. |
4 | Clean Bulb/Panel: Use a dry cloth only. |
5 | Dry and Reassemble: Let everything dry before putting it back together. |
Avoid Moisture
Moisture is bad news for LED fixtures. Water can cause corrosion, short circuits, and even fire hazards. You want to keep your lights dry at all times. If moisture gets inside, it can change the color of your light and make it less bright. Harsh chemicals also hurt the fixture. They can crack plastic and let dust or water sneak in, causing more problems later. Stick to gentle Cleaning Tips and keep your LED fixtures dry for the best results.
Corrosion weakens metal parts.
Moisture scatters light and lowers efficiency.
Water can cause short circuits and sudden failure.
Color shifting happens when moisture changes the coating inside.
Outdoor Cleaning Tips
Weatherproof Methods
Outdoor lights face rain, wind, and dust every day. You want to keep them shining bright and safe. Try these steps to clean your outdoor fixtures the right way:
Use a dry microfiber cloth to dust off dirt, cobwebs, and leaves from the surface.
Mix a few drops of mild dish soap with warm water. Dampen a cloth and wipe the lights to remove smudges.
For tough grime, grab a soft-bristled brush or an old toothbrush. Scrub gently in tight spots.
Dry the lights completely with a lint-free towel. Make sure no moisture stays behind.
While you clean, check for loose screws, broken glass, or rust. Fix these problems right away.
Tip: Always turn off the power before you start cleaning. Safety comes first!
Prevent Corrosion
Rust can ruin outdoor fixtures fast. You want to stop corrosion before it starts. After every cleaning, dry all metal parts well. If you live near the coast, salty air can make rust worse. Use a protective spray or wax on metal surfaces to block moisture. Check for rust spots often. If you see any, clean them with a soft brush and apply a rust-resistant coating. Keeping your lights dry and protected helps them last longer.
Seasonal Checks
Each season brings new challenges for your outdoor lights. In the fall, clear away leaves and twigs so nothing blocks the light. Winter can bring snow and freezing temperatures. Protect your fixtures from ice and cold by checking for cracks or loose parts.
Seasonal Factor | Impact on Outdoor Lighting Fixtures |
|---|---|
Can lead to rust and corrosion, affecting longevity. | |
Extreme Temperatures | May cause electrical issues and damage to fixtures. |
Coastal Salty Air | Increases the risk of corrosion on metal components. |
You should look at your lights every season. Remove debris, check for damage, and make small repairs. These Cleaning Tips help your outdoor fixtures stay bright and strong all year.
Bulb Care
Safe Handling
You want to keep your bulbs working safely and shining bright. Always turn off the electricity before you touch any bulb. Wait for the bulb to cool down so you don’t burn your fingers. When you remove a bulb, hold it gently and avoid squeezing too hard. If you see any cracks or damage, replace the bulb right away. Never clean a bulb while it’s still in the fixture. You can use a soft, dry cloth to wipe the bulb after you take it out. If you need to clean stubborn dust, try using a can of compressed air. This helps you avoid touching the bulb’s surface.
Tip: Always follow the manufacturer’s instructions for your bulbs. This keeps you safe and helps your bulbs last longer.
Clean for Brightness
Dust and dirt can make your bulbs dim and less efficient. You should clean your bulbs regularly to keep them bright. Here are some Cleaning Tips you can use:
Wipe bulbs with a soft, dry cloth to remove dust.
Avoid using damp cloths or cleaning solutions. Water can get inside and damage the bulb.
For LED bulbs, gently wipe the surface and use compressed air for tough spots.
Clean both the bulb and the fixture’s inside and outside surfaces. This can boost light output by up to 30%.
If you keep your bulbs clean, you might need fewer fixtures or lower wattage bulbs to get the same brightness.
Replace Properly
Bulbs don’t last forever. You should know when it’s time to swap them out. Check the table below to see how long different bulbs usually last:
Type of Bulb | |
|---|---|
Halogen | 2,000 – 4,000 |
Incandescent | 750 – 2,000 |
CFL | 10,000 – 20,000 |
LED | 40,000 – 50,000 |
If your bulb starts flickering or looks dim, it’s probably time for a new one. Always use the right type and wattage for your fixture. Handle new bulbs with care and make sure they fit snugly. This helps your lights work safely and keeps your home bright.
General Cleaning Tips
Regular Dusting
You want your lights to shine as bright as possible. Dust settles fast and can block light, making rooms look dim. If you dust your fixtures often, you keep your home looking fresh and help your lights work better. Try using a microfiber cloth or a duster every week. Set a reminder on your phone or calendar so you never forget. When you stick to a cleaning routine, you get more than just a clean look. Take a look at these benefits:
Benefit | Description |
|---|---|
Regular cleaning ensures lights shine at their full capacity, enhancing brightness in the home. | |
Enhance Indoor Air Quality | Cleaning removes dust that can trigger allergies, promoting a healthier living environment. |
Extend the Life of Your Fixtures | Routine cleaning protects fixtures from dirt and debris, prolonging their lifespan. |
Create a Polished Appearance | Clean fixtures reflect care and attention, improving the overall aesthetics of the space. |
Inspection Routine
You should check your lighting fixtures every month. Inspections help you spot problems before they get worse. Look for burnt-out bulbs, flickering lights, and dust buildup. Check wires and connections for signs of wear. Make sure all screws and parts feel tight. If you see loose pieces or damaged covers, fix them right away. Here’s a quick list of things to watch for:
Dust and debris blocking brightness
Worn wires or loose connections
Damaged housing or loose screws
Outdated wiring or overloaded circuits
Tip: If you find anything that looks unsafe, call a professional for help.
Troubleshooting
Sometimes, you run into problems with your lights. Don’t worry! You can fix many issues with a few simple steps:
Tighten loose screws or bolts on the fixture.
Clean the fixture to boost brightness.
Reset the circuit breaker if needed. If it trips again, call an electrician.
You keep your home safe and bright when you follow these Cleaning Tips. Regular care makes a big difference!
When you use Cleaning Tips for each material, your lights last longer. Taking care of your lights often saves you money. It also makes your home brighter and look nicer. If you have hard-to-clean fixtures, you can get help from professionals:
Service Type | Description |
|---|---|
Handles LED upgrades for better efficiency. | |
Design & Performance Consulting | Offers expert lighting advice. |
FAQ
How often should you clean your lighting fixtures?
You should dust your fixtures every week. Deep clean them every three months. Regular cleaning keeps your lights bright and helps them last longer.
Can you use vinegar to clean lighting materials?
Vinegar works well on glass and some metals. Avoid using it on fabric shades or painted surfaces. Always test a small spot first.
What tools do you need for safe cleaning?
You need a microfiber cloth, mild soap, water, and a towel. Use a sturdy ladder for high fixtures. Avoid paper towels and harsh chemicals.