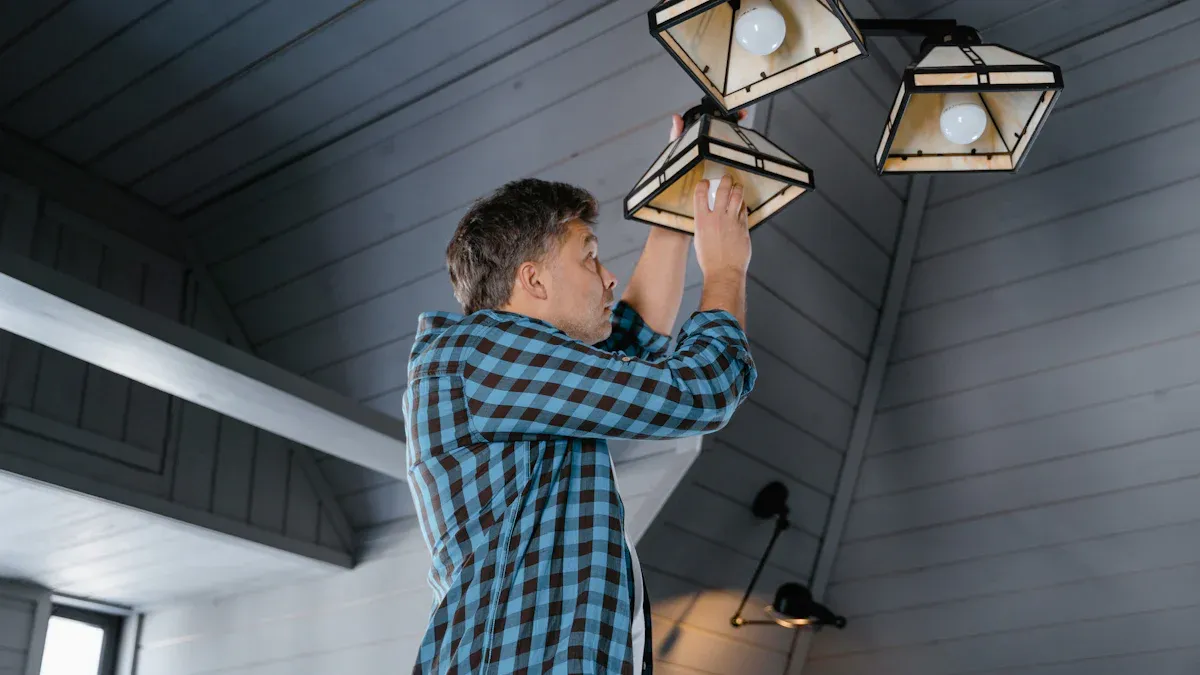
Você pode ficar nervoso ao instalar luzes de teto pela primeira vez, mas você consegue. Uma luminária de teto pode mudar a aparência de qualquer ambiente. Se você seguir as instruções e usar este guia passo a passo, você se sentirá confiante com a instalação da luz de teto DIY. Sempre coloque a segurança em primeiro lugar. Desligue a energia antes de instalar ou remover uma luminária de teto. Use as instruções para verificar se há fios energizados. Se você não tiver certeza, chame um profissional para instalar sua luminária de teto.
Takeaways -chave
Sempre desligue o disjuntor e use um testador de tensão antes de iniciar qualquer trabalho para evitar choques elétricos.
Reúna todas as ferramentas necessárias e use o hardware de montagem correto para garantir que sua luminária de teto esteja segura e protegida.
Combine as cores dos fios corretamente: preto com preto (quente), branco com branco (neutro) e verde ou nu com aterramento para uma fiação segura.
Siga as instruções cuidadosamente e prepare seu espaço de trabalho limpando a área e pré-montando as peças antes da instalação.
Teste sua nova luminária de teto após a instalação e chame um profissional se notar algum problema ou se sentir inseguro em qualquer etapa.
Precauções de segurança
Antes de iniciar qualquer instalação de luminária de teto, você precisa se concentrar na segurança. Tomar as medidas corretas pode ajudá-lo a evitar acidentes e manter sua casa segura. Aqui estão algumas dicas e medidas de segurança importantes para instalação.
Desligue a energia
Sempre desligue a energia no disjuntor antes de tocar em qualquer fio ou acessório. Este passo não é apenas uma sugestão – é uma obrigação. Se você pular isso, corre o risco de levar um choque por fios energizados.
Dica: Vá até a caixa do disjuntor e desligue a energia da sala onde irá trabalhar.
Aqui estão alguns motivos pelos quais esta etapa é importante:
Desligar a fonte de alimentação principal mantém você longe de fios elétricos energizados.
Esta etapa evita riscos elétricos e não é negociável.
Mesmo que o interruptor da luz esteja desligado, alguns fios ainda podem transportar corrente.
A verificação dupla com um testador de tensão garante que o circuito esteja seguro.
Use um testador de tensão
Depois de desligar a energia, use um testador de voltagem para verificar se não há eletricidade fluindo pelos fios. Esta ferramenta ajuda a confirmar se a área é segura para trabalhar.
Os padrões NFPA 70E e OSHA exigem que você use um testador de tensão com classificação adequada. Você precisa testar fase-fase e fase-terra. Sempre verifique seu testador em uma fonte ativa conhecida antes e depois do uso. Esta etapa ajuda a evitar erros e mantém você seguro.
Equipamento de segurança pessoal
Você deve sempre usar equipamento de proteção individual (EPI) ao trabalhar com eletricidade. Isso inclui óculos de segurança e luvas isoladas.
Os trabalhadores que utilizam EPI têm 1,5 a 3 vezes menos lesões do que aqueles que não o fazem.
Não usar EPI aumenta o risco de lesões em mais de três vezes.
Treinamento de segurança e uso de EPI andam de mãos dadas para prevenir acidentes.
Lembrar, cerca de 270 milhões de lesões no local de trabalho acontecem todos os anos em todo o mundo. Muitos deles poderiam ser evitados com equipamento de segurança e treinamento adequados.
Seguir estas medidas de segurança para instalação protege você e sua casa. Faça da segurança sua principal prioridade sempre que trabalhar com instalações elétricas.
Ferramentas e Materiais
Ferramentas essenciais
Você deseja que suas luminárias de teto permaneçam seguras e funcionem com segurança. Antes de começar, reúna todas as ferramentas necessárias para instalação. Aqui está uma lista de verificação útil para ajudá-lo a se preparar:
Chaves de fenda (cabeça chata e Phillips)
Cortadores e descascadores de fio
Alicate
Testador de tensão
Escada ou escadote
Fita isolante
Porcas e conectores de fio
Essas ferramentas ajudam você a lidar com a fiação, proteger a luminária e verificar a segurança. Você também pode precisar de uma furadeira se planeja instalar uma luminária pendente ou um lustre. Ter as ferramentas certas torna o trabalho mais tranquilo e seguro. Manutenção regular, como verificação de fios e limpeza, mantém suas luminárias de teto funcionando bem e durando mais.
Dica: Sempre verifique seu kit de ferramentas antes de começar. A falta de ferramentas pode atrasar você ou dificultar o trabalho.
Hardware de montagem
Hardware de montagem mantém suas luminárias de teto no lugar. O tipo que você precisa depende do peso e estilo do aparelho. Para instalar um lustre, muitas vezes você precisa suporte extra. Fixações pesadas podem exigir suportes reforçados ou âncoras especiais. Luzes embutidas mais leves usam parafusos e placas simples.
Tipo de luminária | Hardware de montagem necessário | Suporte de peso |
|---|---|---|
Montagem embutida | Parafusos básicos, placa de montagem | Até 10 libras |
Montagem semi-embutida | Placa mais forte, parafusos mais longos | 10-20 libras |
Luz pendente | Suporte, corrente ou haste reforçada | 10-30 libras |
Lustre | Suporte resistente, ancoragem em vigas | Até 50 libras ou mais |
Sempre verifique se o seu teto pode suportar o aparelho. Para instalação de luminária pendente ou lustre, certifique-se de que a caixa elétrica esteja classificada para o peso. O hardware de montagem seguro mantém sua luminária segura e estável.
Escolhendo uma luminária de teto
Escolher a luminária de teto certa muda o clima e a função do seu ambiente. Pense no tamanho da sala, na altura do teto e em como você usa o espaço. Por exemplo, você pode instalar uma luminária suspensa sobre uma ilha de cozinha ou usar um lustre na sala de jantar. As montagens embutidas funcionam melhor para tetos baixos, enquanto salas maiores podem suportar luminárias de teto maiores.
Tipo de quarto | Melhor tipo de luminária | Dicas de colocação |
|---|---|---|
Entrada | Lustre, pingente | Peça de declaração, folga de 7 pés |
Sala de estar | Pendente grande, lustre | Iluminação em camadas, dimmers para o clima |
Sala de jantar | Lustre, pingente | 30-36 polegadas acima da mesa |
Quarto | Montagem embutida, semi-embutida | Suave e até leve |
Ao instalar uma luminária pendente, verifique a altura de suspensão e certifique-se de que ela se ajusta ao espaço. Para instalação do lustre, siga sempre as regras de peso e montagem. Uma boa preparação antes de instalar uma luminária pendente ajuda a evitar problemas posteriores. Escolha luminárias de teto que combinem com seu estilo e forneçam a quantidade certa de luz. As lâmpadas LED economizam energia e duram mais, tornando-os uma escolha inteligente para qualquer luminária.
Etapas de preparação
Limpe a área
Comece certificando-se de que você tenha bastante espaço para trabalhar. Tire os móveis do caminho. Retire quaisquer decorações ou itens próximos ao teto. Você deseja um caminho livre para chegar ao local onde instalará a nova luz. Se você planeja uma instalação de luz suspensa, precisará de ainda mais espaço porque poderá usar uma escada. Uma área limpa ajuda a evitar tropeçar ou deixar cair ferramentas. Ele também mantém seu novo acessório protegido contra danos.
Dica: Estenda um pano para coletar poeira ou pequenos parafusos. Isso torna a limpeza muito mais fácil.
Leia as instruções
Antes de fazer qualquer outra coisa, leia as instruções que acompanham a luminária de teto. Cada luminária vem com seu próprio conjunto de instruções. A leitura das instruções ajuda você a entender cada etapa e garante que você tenha todas as peças. Muitos manuais técnicos enfatizam que você deve siga as instruções incluídas cuidadosamente. Eles lembram você de verificar se a energia está desligada e de usar o equipamento de segurança correto. Se você se sentir inseguro, ligue para um eletricista licenciado. Esta etapa não é apenas para iniciantes – os especialistas também fazem isso.
Aspecto | Evidências do Manual |
|---|---|
Ênfase na Instrução | Os usuários são explicitamente instruídos a ler as instruções do usuário cuidadosamente antes de usar e guardá-las para referência futura. |
Avisos de segurança | A instalação deve ser feita por eletricistas autorizados; a instalação inadequada pode causar ferimentos fatais e incêndio. |
Instruções de uso | Aconselha não conectar à rede elétrica enquanto estiver embalado e cumprir as regulamentações elétricas locais. |
Sempre leia as instruções antes de começar.
Certifique-se de ter todas as peças necessárias.
Entenda como funciona o aparelho.
Planeje seus passos e reúna suas ferramentas.
Isto é especialmente importante para a instalação de luminárias suspensas ou qualquer luminária com peças extras. Uma boa preparação antes de instalar uma luminária pendente economiza tempo e problemas posteriores.
Suporte de montagem pré-montado
Agora, retire o suporte de montagem da caixa. A maioria das luminárias de teto exige que você fixe este suporte na caixa de teto antes de instalar o acessório. Alguns suportes precisam de um pouco de montagem primeiro. Siga as instruções para montar o suporte. Use os parafusos e ferragens que acompanham a embalagem. Se você pular esta etapa, poderá ter problemas para alinhar o equipamento posteriormente. A pré-montagem do suporte torna o resto da instalação muito mais suave. Você se sentirá mais confiante ao instalar a lâmpada porque sabe que tudo cabe.
Nota: Verifique novamente se o suporte está firme e nivelado. Um suporte solto pode causar problemas durante a instalação da luminária pendente.
Remover luminária antiga
Desmontar sua luminária antiga é um grande passo antes de instalar uma nova. Você deseja fazer isso com segurança e cuidado. Se você se apressar, poderá danificar os fios ou se machucar. Muitas escolas e empresas descobriram que a remoção segura ou mesmo a manutenção de instalações antigas pode reduzir os riscos e poupar dinheiro. Por exemplo, um distrito escolar usou kits especiais para atualizar suas luzes sem remover os antigos corpos de fixação. Isto ajudou-os a evitar a exposição ao amianto, a reduzir o desperdício e a poupar nos custos de mão-de-obra. Embora você remova sua luminária antiga de casa, isso mostra por que a segurança é importante.
Desconecte os fios
Em seguida, retire a tampa ou cobertura da luminária. Você verá os fios dentro. Desparafuse cuidadosamente as porcas dos fios que conectam os fios do aparelho aos fios do teto. Geralmente você verá fios de cobre pretos, brancos e, às vezes, verdes ou nus. Separe cuidadosamente os fios. Se você notar algum dano, como isolamento derretido ou rachado, pare e chame um profissional. Mantenha sempre os fios separados para que não se toquem.
Dica: Coloque as porcas de volta nos fios do teto depois de desconectá-los. Isso mantém você seguro enquanto você termina o trabalho.
Remover o hardware de montagem
Agora você pode remover o resto da luminária antiga. Use uma chave de fenda para afrouxar os parafusos que prendem o acessório à caixa de teto. Segure o aparelho com uma mão para que não caia. Assim que os parafusos forem retirados, abaixe a luminária e reserve.
Verifique a caixa do teto e os fios quanto a sinais de danos. Se tudo estiver bem, você está pronto para instalar sua nova luminária. Se você vir fios velhos ou desgastados, chame um eletricista antes de continuar com a instalação.
Lembre-se de que a remoção segura da luminária antiga ajuda a evitar acidentes e torna os próximos passos muito mais fáceis. Agora você está pronto para instalar sua nova luminária e desfrutar de um ambiente mais claro!
Guia de instalação passo a passo

Você removeu o acessório antigo e preparou suas ferramentas. Agora você está pronto para a parte mais importante: instalar luzes de teto. Este guia de instalação passo a passo o ajudará a concluir o trabalho de maneira segura e correta. Vamos percorrer cada etapa juntos.
Instalação de luz de teto
Comece verificando se a energia ainda está desligada. Use seu testador de voltagem mais uma vez. A segurança sempre vem em primeiro lugar. Reúna suas ferramentas e certifique-se de que sua escada esteja estável. Se você tiver uma luminária pesada, peça a um amigo para ajudá-lo a pendurá-la.
Aqui está uma lista de verificação simples antes de começar:
Desligue a energia no disjuntor e confirme com um testador de tensão.
Use luvas e óculos de segurança.
Reúna todas as ferramentas: chaves de fenda, descascadores de fios, porcas de fios, fita isolante e ferramentas de montagem.
Mantenha uma lanterna por perto se o quarto estiver escuro.
Certifique-se de que sua caixa de teto seja adequada ao peso de sua nova luminária, especialmente para instalação de lustre ou quando você instala uma luminária pendente.
Agora, segure a nova luminária de teto perto da caixa de teto. Se o seu aparelho for pesado, apoie-o com um ajudante ou use um gancho temporário. Isso torna a instalação de uma luminária muito mais fácil e segura.
Conectando Fios
A fiação de sua nova luminária de teto é a próxima etapa. Você verá três tipos de fios: preto (quente), branco (neutro) e verde ou cobre nu (terra). Sempre combine as cores. O preto se conecta ao preto, o branco ao branco e o verde ou nu ao terra. Isso mantém sua instalação segura e segue o Código Elétrico Nacional.
Tipo de fio | Cor | Conecta-se a | Propósito |
|---|---|---|---|
Quente | Preto, vermelho, azul | Preto ou outro quente | Transporta corrente viva |
Neutro | Branco, Cinza | Branco ou neutro | Retorna atual |
Chão | Verde, Nu | Verde ou nu | Aterramento de segurança |
Para conectar os fios:
Torça as pontas dos fios correspondentes.
Prenda cada conexão com uma porca de fio. Dê um puxão suave em cada porca para verificar se está firme.
Enrole fita isolante ao redor das porcas do fio para maior segurança.
Coloque os fios cuidadosamente na caixa do teto. Isso evita beliscões ou danos ao pendurar a luz.
Dica: Nunca misture os fios. A mistura de fios quentes, neutros ou terra pode causar choques ou incêndios. Sempre verifique suas conexões antes de prosseguir.
Se você estiver instalando luminárias de teto com recursos inteligentes, siga as instruções do fabricante para quaisquer fios ou controles extras.
Segurança do fio terra
O aterramento é uma parte fundamental da instalação segura. O fio terra protege você contra falhas elétricas. Ele envia eletricidade perdida com segurança para a terra se algo der errado. A Electrical Safety Foundation International afirma que o aterramento ajuda a prevenir milhares de ferimentos e mortes a cada ano.
Para conectar o fio terra:
Encontre o fio de cobre verde ou nu de sua luminária e da caixa de teto.
Torça-os e prenda-os com uma porca de arame.
Se a sua caixa de teto for de metal, conecte o fio terra ao parafuso verde dentro da caixa.
Nota: O aterramento não é opcional. É exigido pelos códigos de construção e ajuda o disjuntor a desarmar se houver algum problema. Sempre use tomadas aterradas e GFCIs em cozinhas, banheiros e espaços externos.
Se você estiver instalando um lustre ou precisar instalar uma luminária pendente, certifique-se de que o fio terra seja longo o suficiente para alcançar a caixa. Nunca pule esta etapa.
Protegendo o acessório
Agora você está pronto para fixar o acessório no teto. Levante a lâmpada do teto no lugar. Alinhe os orifícios de montagem com o suporte instalado anteriormente. Use os parafusos fornecidos para fixar a base do acessório ou cobertura. Aperte os parafusos até que o acessório fique firme e nivelado.
Para luminárias de teto pesadas, use sempre as ferragens que acompanham a lâmpada. Suportes de montagem e caixas de junção aprovados são essenciais para a instalação do lustre.
Nunca pendure a luz em caixas fracas ou danificadas. A caixa deve suportar todo o peso do aparelho.
Se você instalar uma luminária pendente, ajuste a altura de suspensão antes de apertar tudo.
Legenda: Uma instalação segura evita que seu aparelho caia. Acessórios soltos podem causar ferimentos, luzes tremeluzentes ou até incêndios. Siga sempre as instruções do fabricante e os códigos de construção locais.
Quando terminar, adicione cortinas, lâmpadas ou capas decorativas. Verifique novamente se todos os parafusos estão apertados e se o acessório está estável. Você concluiu o processo principal de instalação. Você está quase pronto para desfrutar de sua nova luminária de teto!
Teste
Depois de terminar de instalar sua nova luminária de teto, você precisa ter certeza de que tudo funciona com segurança. Os testes ajudam a detectar quaisquer problemas antes de começar a usar a luz todos os dias. Vamos percorrer as últimas etapas juntos.
Restaurar energia
Você terminou a fiação e fixou o acessório. Agora é hora de restaurar a energia. Antes de virar o disjuntor, faça uma rápida inspeção final. Procure parafusos soltos, fios expostos ou peças faltando. Se você vir algo errado, conserte primeiro.
Quando você restaura a energia, siga estas importantes etapas de segurança:
Diga a todos em sua casa que você está prestes a ligar novamente a energia.
Verifique novamente se todas as ferramentas e escadas estão fora da área de trabalho.
Vá até a caixa do disjuntor e ligue o circuito novamente.
Use um testador de voltagem para confirmar se a energia voltou para a lâmpada do teto.
Dica de segurança: Sempre siga as regras de bloqueio/sinalização e verifique seu trabalho antes de restaurar a energia. Padrões OSHA e NFPA 70 exigem que você verifique se tudo está seguro antes de ligar a eletricidade novamente. Essas regras ajudam a prevenir acidentes e a manter sua casa segura.
Teste a lâmpada
Agora você verá seu trabalho duro valer a pena! Gire o interruptor de parede para ligar sua nova luminária de teto. Fique atento a qualquer cintilação, zumbido ou cheiro estranho. Se a luz não acender, desligue a energia e verifique a fiação novamente.
Testar a lâmpada é mais do que apenas apertar um interruptor. Muitos especialistas usam analisadores especiais para verificar problemas como ruído de sinal ou saída instável. Por exemplo, quando os técnicos substituíram as lâmpadas e limparam as ópticas em determinados modelos, observaram grandes melhorias na estabilidade e no brilho. Se você notar problemas, tente estas etapas:
Certifique-se de que a lâmpada esteja bem aparafusada.
Verifique se todos os fios estão conectados corretamente.
Procure por peças soltas ou tampas.
Problema | O que verificar | O que fazer |
|---|---|---|
A luz não acende | Lâmpada, fiação, disjuntor | Verifique novamente as conexões, substitua a lâmpada |
Cintilante ou zumbido | Fios soltos, tipo lâmpada | Aperte os fios, use a lâmpada correta |
Luz fraca ou irregular | Potência da lâmpada, tipo de acessório | Use a lâmpada recomendada, ajuste a lâmpada |
Depois de concluir essas verificações finais, sua luminária de teto deverá funcionar perfeitamente. Se você ainda tiver problemas, chame um profissional para obter ajuda. Aproveite o seu quarto mais iluminado e seguro!
Solução de problemas
Problemas comuns
Você pode ter alguns problemas depois de terminar a instalação da luminária de teto. Não se preocupe: a maioria dos problemas tem soluções simples. Aqui estão algumas coisas comuns que as pessoas notam:
A luz não acende. Pode ser uma lâmpada queimada ou um fio solto. Às vezes, a lâmpada só precisa ser substituída.
O acessório balança ou parece solto. Você pode ter usado a caixa de tomadas errada ou não apertar os parafusos o suficiente. Sempre use uma caixa adequada para luzes de teto e verifique todo o hardware.
Luzes piscando ou zumbindo. Fios soltos ou o tipo errado de lâmpada podem causar isso. Lâmpadas com ventilador ajudam se você tiver um ventilador de teto com luz.
As lâmpadas queimam rapidamente. Sobretensão ou vibrações podem danificar as lâmpadas. Certifique-se de usar as lâmpadas certas para o seu equipamento.
O aparelho treme. Se você fixar a caixa diretamente no teto em vez de uma viga de suporte, a lâmpada poderá oscilar. A poeira nas pás do ventilador também pode piorar as coisas.
Dica: Sempre verifique a segurança do seu trabalho. Se você não tiver certeza, pare e revise as instruções.
Quando chamar um profissional
Às vezes, você precisa de mais do que uma solução rápida. Alguns problemas significam que você deve ligar imediatamente para um eletricista licenciado. Aqui estão os sinais de que você deve procurar ajuda:
Os disjuntores desarmam com frequência. Isso pode significar um curto-circuito ou fios sobrecarregados, o que é um grande risco à segurança.
Você sente o cheiro de algo queimando ou vê marcas de queimado perto de tomadas ou interruptores. Isso significa que os fios podem estar superaquecendo.
As tomadas ficam quentes ou faíscas quando você conecta as coisas. Isso não é seguro e precisa de atenção especializada.
Você ouve um zumbido nas paredes. Conexões soltas podem causar incêndios elétricos.
As luzes piscam ou diminuem em mais de um cômodo. Isso aponta para problemas maiores de fiação.
Você sente uma sensação de choque ou formigamento ao tocar nos aparelhos. Isso mostra um problema de aterramento.
Sua casa tem fiação antiga ou tomadas de dois pinos. Estes não atendem aos padrões de segurança atuais.
Nota: Sua segurança está em primeiro lugar. Se você observar algum desses sinais de alerta, pare de usar o aparelho e chame um profissional. Nunca arrisque sua segurança por um projeto DIY.
Um profissional pode verificar sua fiação, corrigir problemas ocultos e garantir que sua instalação atenda a todos os códigos de segurança. Você se sentirá melhor sabendo que sua casa está segura e que sua nova luminária de teto funciona como deveria.
Você pode instalar uma luminária de teto com segurança se seguir cada passo e prestar atenção aos detalhes. Sempre verifique seu trabalho e peça ajuda se não tiver certeza. Aqui está o que ajuda a manter seu projeto seguro e bem-sucedido:
Use fiação segura e acessórios de montagem resistentes.
Escolha materiais que resistam ao calor e atendam aos padrões de segurança.
Certifique-se de que a lâmpada esteja pendurada na altura certa.
Não tenha pressa e seja paciente. Com cuidado e passos certos, você pode iluminar seu ambiente com confiança!
Perguntas frequentes
Quanto tempo leva para instalar uma luminária de teto?
A maioria das pessoas termina em cerca de 30 a 60 minutos. Se você nunca fez isso antes, talvez precise de um pouco mais de tempo. Vá devagar e verifique cada passo.
Posso instalar uma luminária de teto sem ajuda?
Você pode instalar uma luminária pequena ou leve sozinho. Se a lâmpada for pesada ou grande, peça ajuda a um amigo. Isso torna o trabalho mais seguro e fácil.
E se os fios do meu teto forem de cores diferentes?
Sempre combine preto com preto (quente), branco com branco (neutro) e verde ou nu com terra.
Se você vir outras cores, verifique as instruções ou chame um eletricista para obter orientação.
Preciso de ferramentas especiais para luminárias de teto LED?
Você não precisa de ferramentas especiais para a maioria das luminárias LED. Use as mesmas chaves de fenda, descascadores de fios e testador de tensão. Algumas luzes LED possuem fios de conexão rápida, o que torna a instalação ainda mais fácil.